Greetings! Glad to see you back.
This is the fourth and final chapter in our React Native and Redux cryptocurrency app series.
So far we have:
- Set-up our project
- Wired up Redux
- Fetched data with Redux
The only thing for us to do is create our views with React. The most fun part!
Where we left off
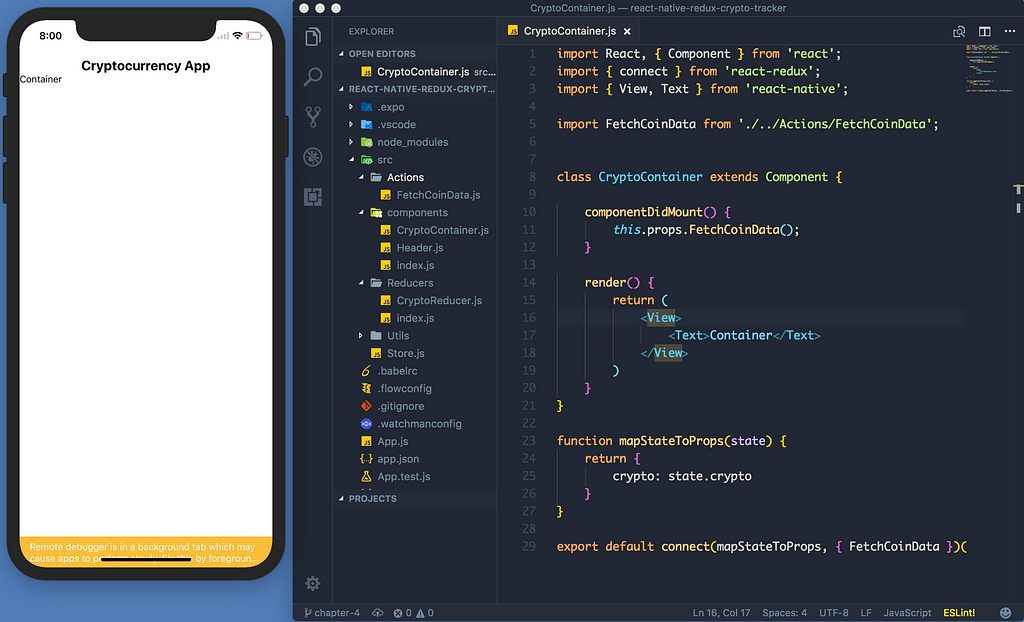
Quick change: set the CryptoReducer.js intialState data prop to an empty array instead of null! It won’t work if you don’t do this — apologies!
Alrighty, here’s what’s left to do:
Create a stateless component called CoinCard.js and create the list item.
Remember the sketch called “thinking in React” from the old times?
This perfectly explains how our app works. It goes like this:
- The yellow border is our App.js — app container
- Blue border is our Header.js component
- Green border is our CryptoContainer.js — holds our list items
- Red and neon blue is our CoinCard.js — lists items.
Makes sense, right? All we need to do is implement the red and neon blue borders.
Start by creating the stateless component.
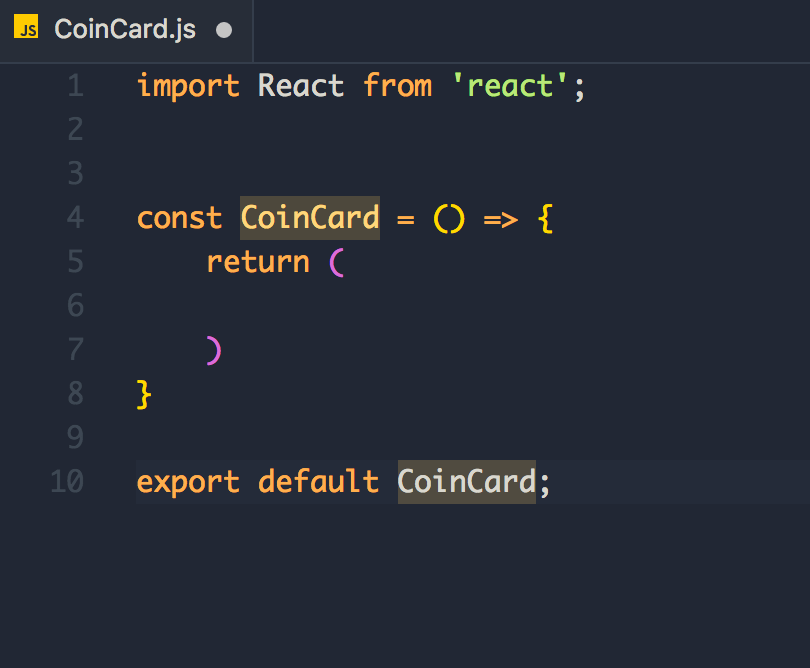
Looks good!
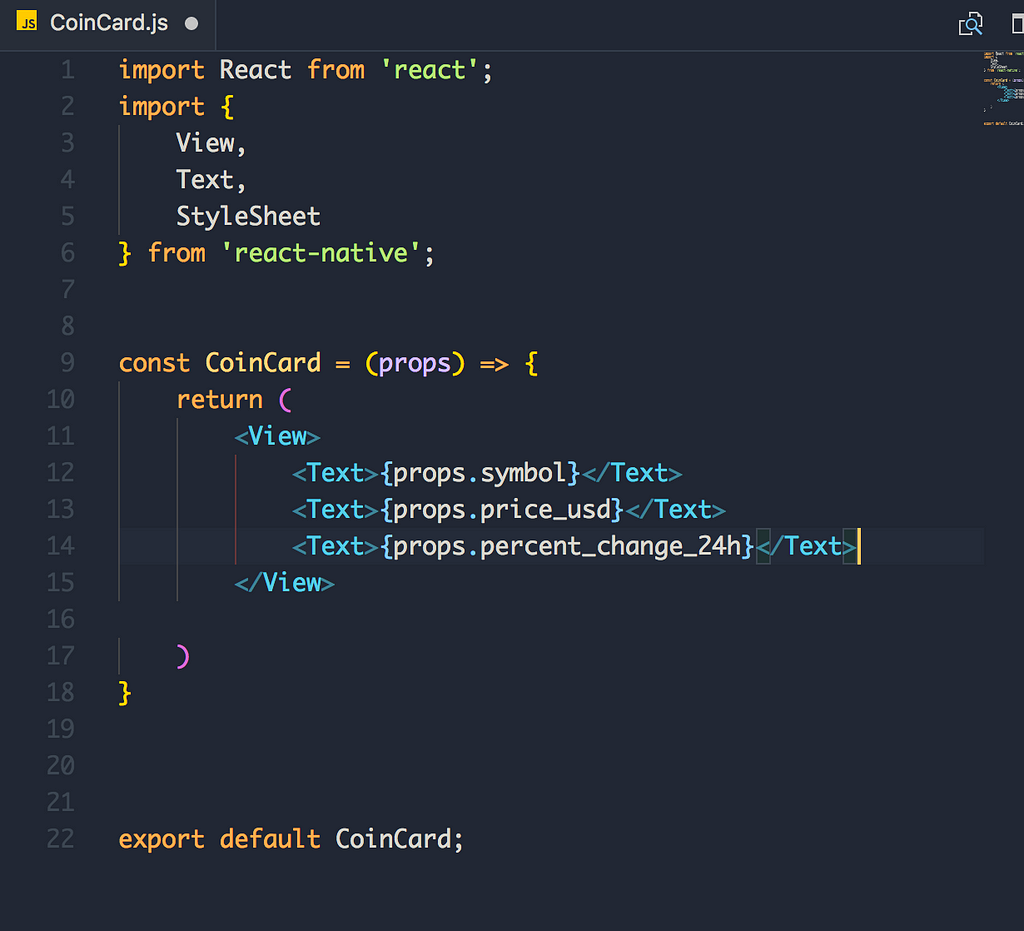
Import View, Text, StyleSheet from “react-native” — we need these to create our view.
Next let’s declare our props. Let’s name these the same as the data in our API.
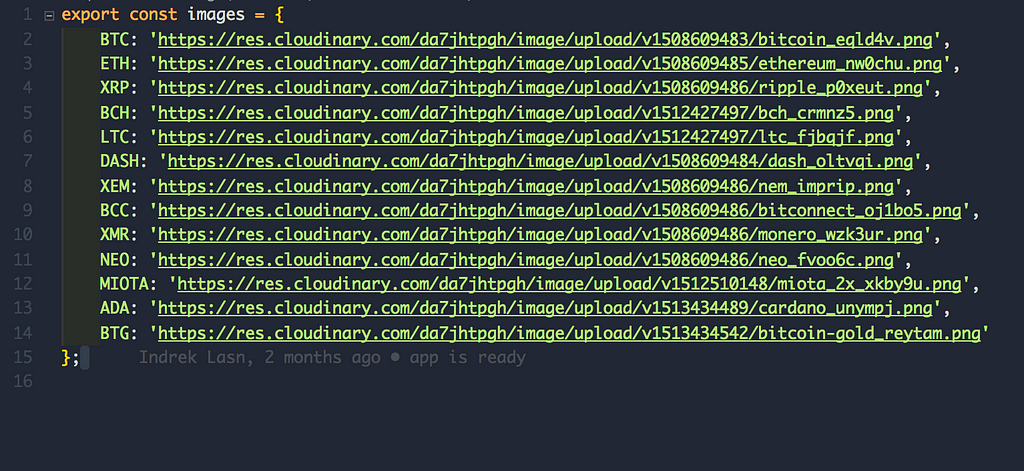
Next up, let’s add the coin icons. Unfortunately, the API does not include icons, so we have to compensate. Not to worry — I’ve got your back!
Make a file in Utils called CoinIcons.js and add these links. I uploaded the icons to and host them as static assets. If you want to help me — feel free to add the rest and make a PR! Here’s the icon set.
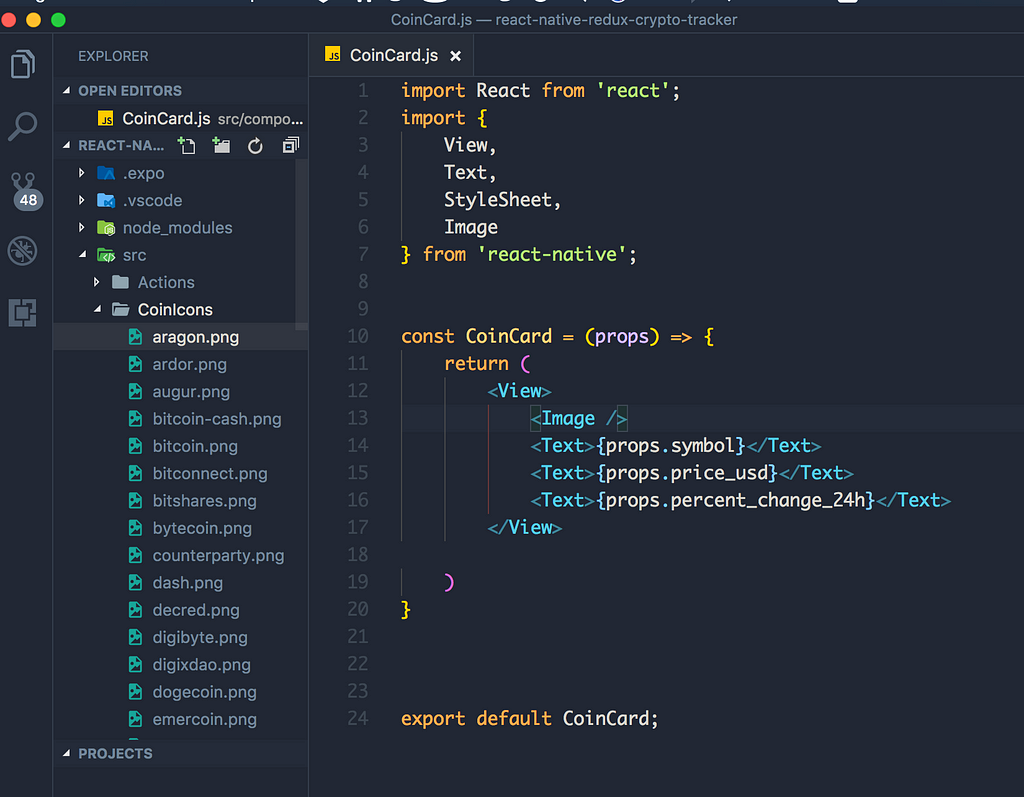
Did you notice something new other than the CoinIcons folder? Yep, we imported the Image tag from ‘react-native’
<Image />
A React component for displaying different types of images, including network images, static resources, temporary local images, and images from local disk, such as the camera roll.
Source
Basically it’s the native version of HTML5 <img /> tag. But it has different props.
The <Image /> property we are interested in is called source

We use require if the want an icon from our computer, and uri if it’s outside our computer (on the interwebz).
We add these styles to our elements, as well. Don’t forget these, otherwise the image won’t show up!

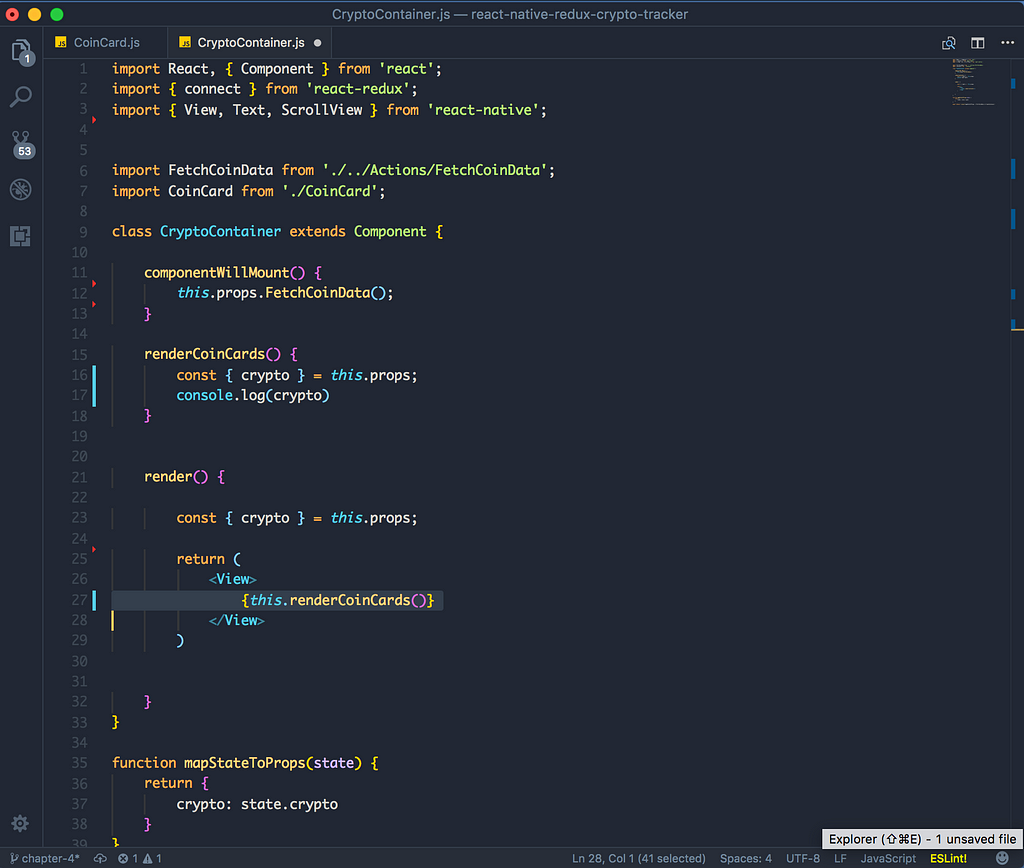
Time to test! Import the CoinCard to our CryptoContainer and place it in the render() method. We also need to pass the props.
Start by making a method called renderCoinCards inside the container.
Then place it in the render function:
Next up — let’s iterate our crypto.data array. Remember — it’s just an array which holds our objects.
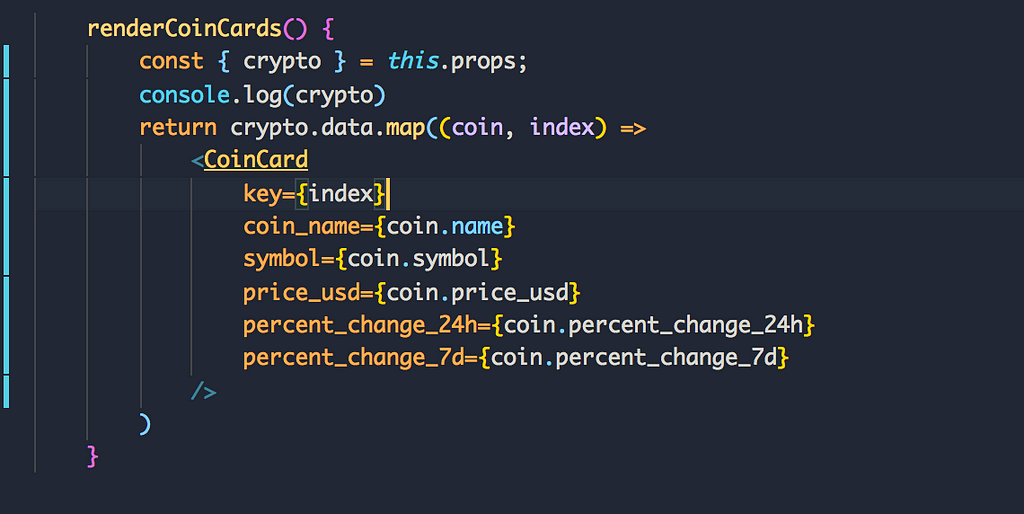
We’re just calling the map() method on our data array and iterating all the objects inside. For each object, we return a CoinCard component with the following props.
Almost there!
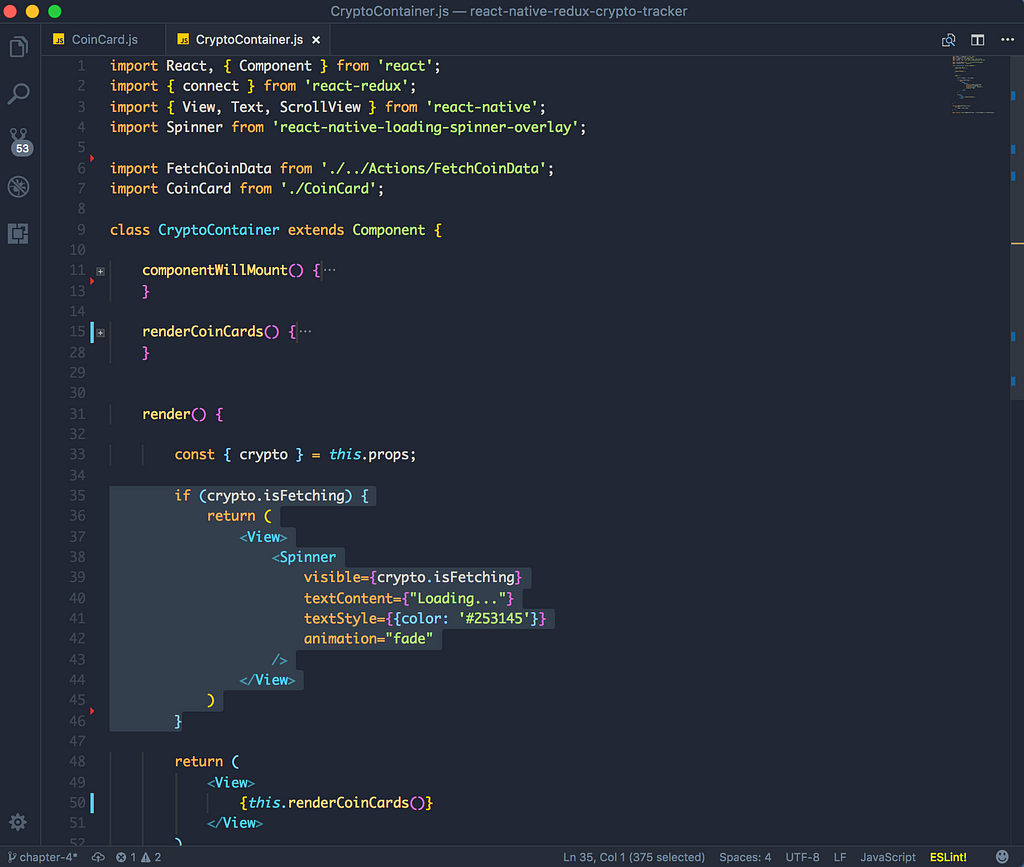
We are missing the spinner and when to show the spinner logic.
Install a package called
$ npm i --save react-native-loading-spinner-overlay
and import it to our container:
import Spinner from ‘react-native-loading-spinner-overlay’;
Let’s write a simple if condition. Remember that we have a isFetching boolean prop under the crypto — try to implement this.
Are you ready?!
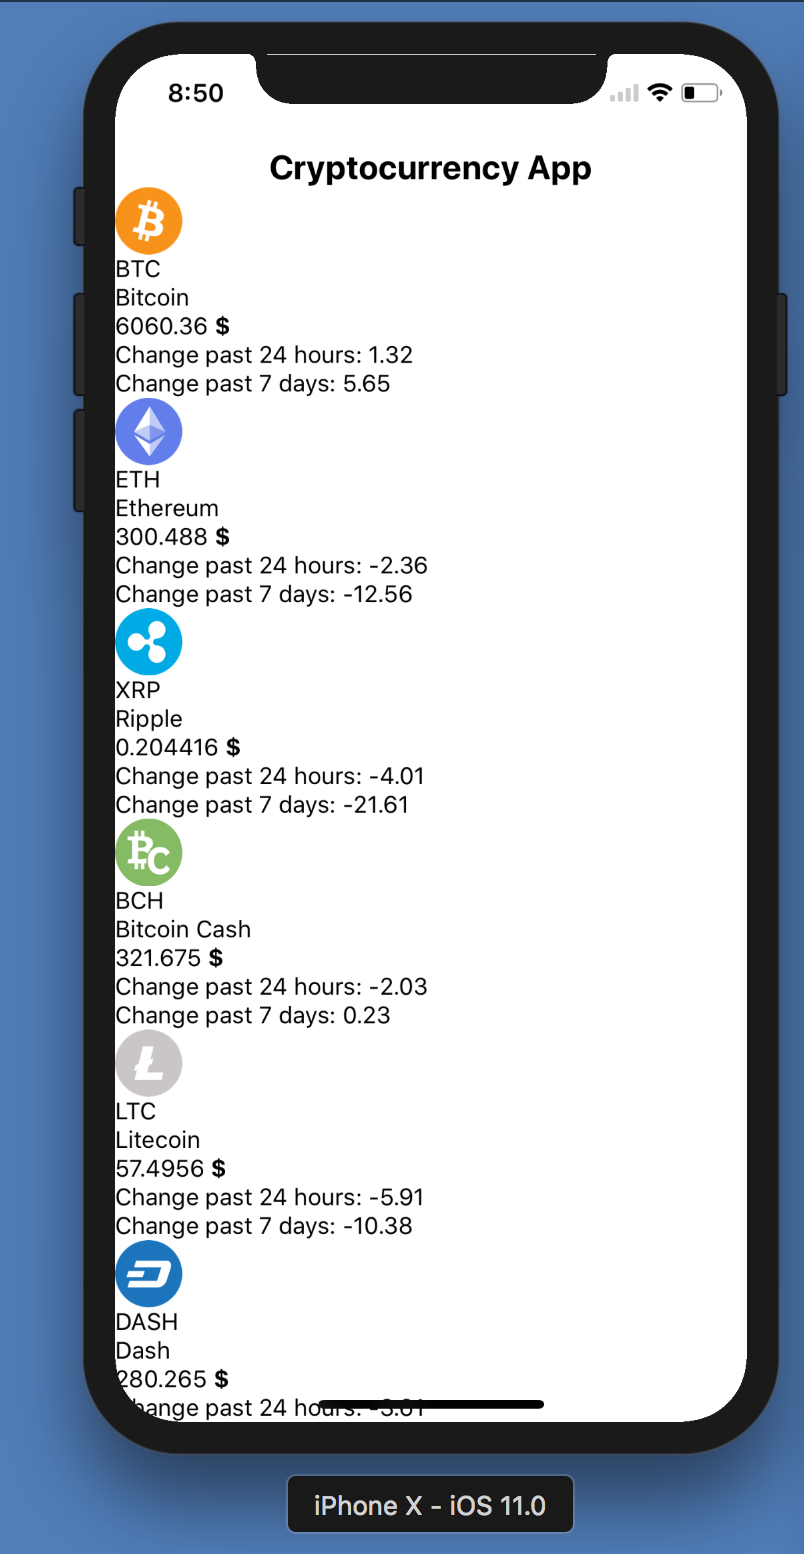
Wohoo! It works! But did you notice something weird?
Try scrolling the app: nothing happens.
That’s because it’s a <View> tag — it doesn’t have any touch features. We need to use the <ScrollView> tag.
<ScrollView />
Component that wraps platform ScrollView while providing integration with touch locking “responder” system.
Import ScrollView and StyleSheet from the react-native package.

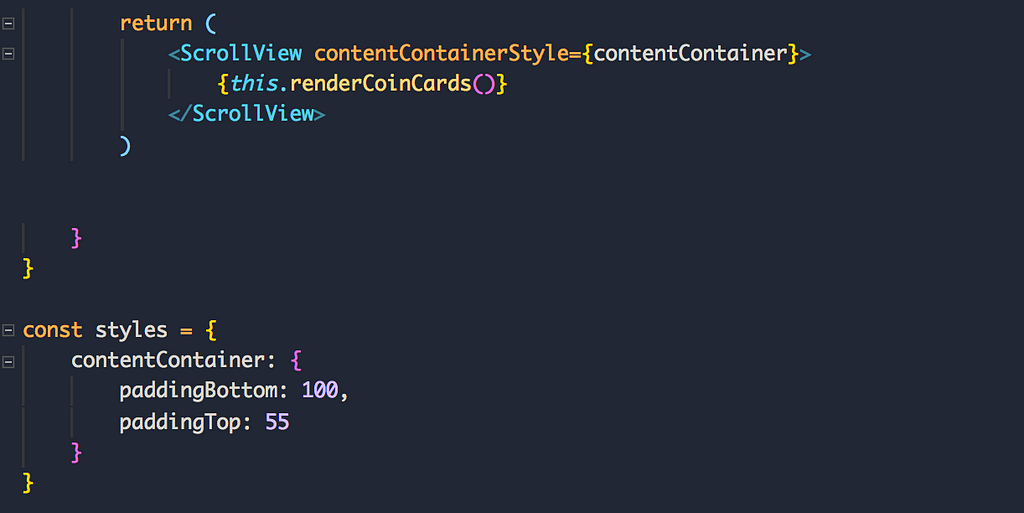
Notice the new prop called contentContainerStyle
These styles will be applied to the scroll view content container which wraps all of the child views
Add padding to the bottom and top for our ScrollView.
Make the app pretty and shiny!

We don’t want our app to be this grotesque — do we?
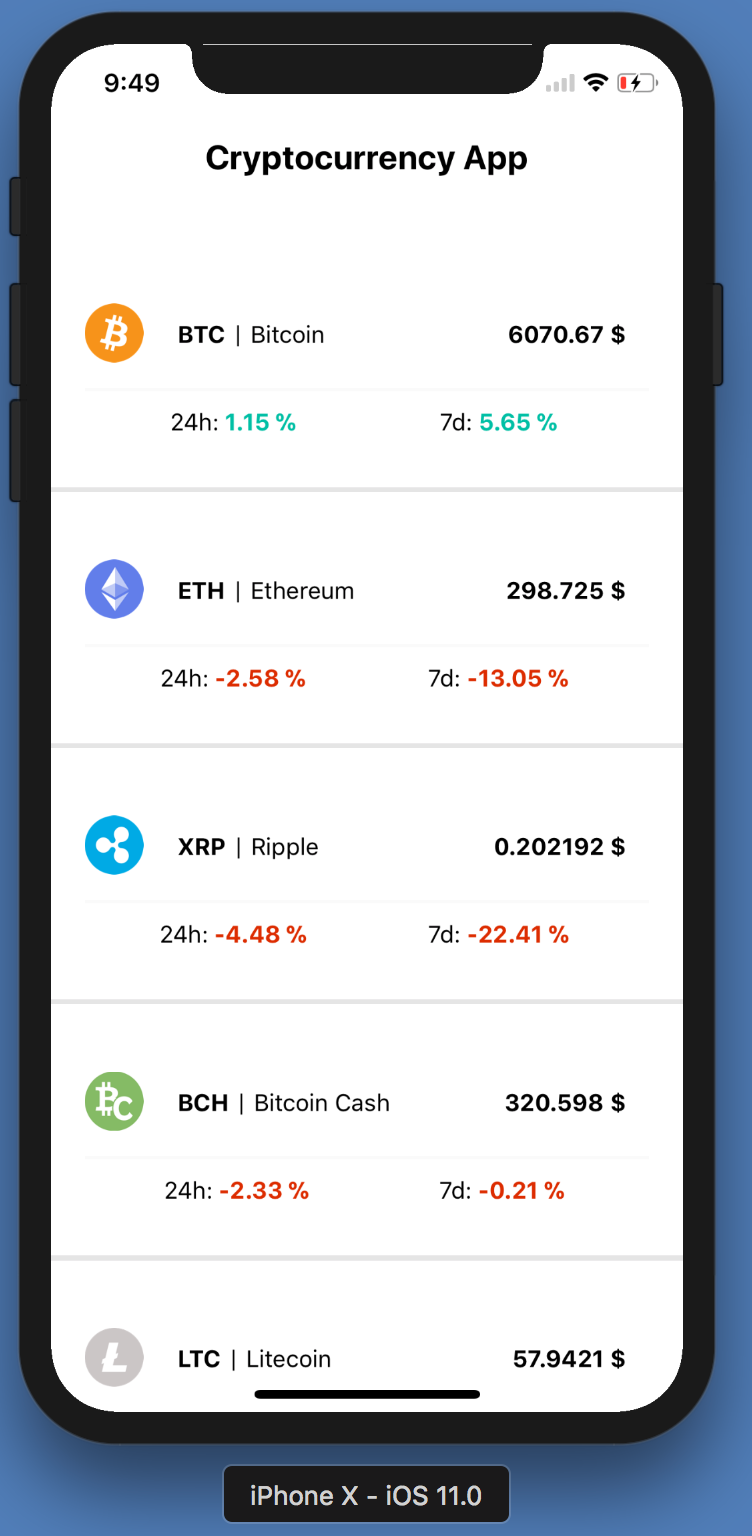
That’s how we like it.
Since it’s fairly trivial CSS, here’s the final CoinCard.js component.
Thank you so much for making it through! Please let me know which subjects you would like me to write about next! RxJs — VueJS — Mobx — GraphQL?
Until next time — oh and don’t forget to follow me on Medium, star the Github repository, follow me on Twitter, clap and finally — spread it to your friends! ❤
Here’s the source code as always!
Best of wishes,
Indrek
Let’s Build: Cryptocurrency Native Mobile App With React Native + Redux — Chapter IV was originally published in freeCodeCamp on Medium, where people are continuing the conversation by highlighting and responding to this story.
This content was originally published here.